Setting Up a CS Node
This guide walks through setting up a CS Node from scratch. There are no terminal commands to run — the CS Node OS handles everything automatically. You only need the CS Wallet web app and the Cloud Service browser extension installed on your computer.
Overview
┌─────────────────────────────────────────────────────────────────────┐
│                       Setup Flow                                     │
├─────────────────────────────────────────────────────────────────────┤
│                                                                     │
│  1. Send collateral from CS Wallet                                  │
│          │                                                          │
│          ▼                                                          │
│  2. Extension approves → wallet detects collateral                  │
│          │                                                          │
│          ▼                                                          │
│  3. [While waiting ~3.3h] Create VM in Proxmox with CS Node OS ISO  │
│          │                                                          │
│          ▼                                                          │
│  4. cs-mage starts automatically — note the Node Key + IP          │
│          │                                                          │
│          ▼                                                          │
│  5. Collateral reaches 100 confirmations → click Configure Node     │
│          │                                                          │
│          ▼                                                          │
│  6. Click Start (▶) — extension signs the transaction               │
│          │                                                          │
│          ▼                                                          │
│  7. Node goes CONFIRMED ✅                                          │
│                                                                     │
└─────────────────────────────────────────────────────────────────────┘
Step 1 — Send the Collateral
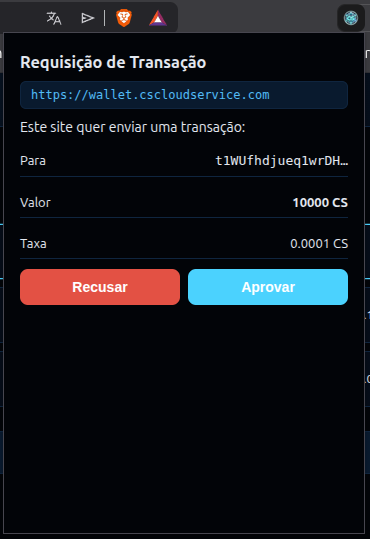
Open the CS Wallet web app with the Cloud Service Extension connected. Use the Send tab (or the internal transfer feature) to send the exact collateral amount to your collateral address.

| Tier | Exact Amount |
|---|---|
| PROTON | 10,000 CS |
| ELETRON | 25,000 CS |
| NEUTRON | 100,000 CS |
| FOTON | 500,000 CS |
WARNING
Send the exact amount in a single transaction. The network identifies collateral by its precise value. Splitting it into multiple UTXOs will not be recognized.
The Cloud Service Extension will open an approval popup. Review and click Approve.
As soon as the transaction is broadcast, the CS Wallet Nodes tab automatically detects it and shows a Configure Node button.
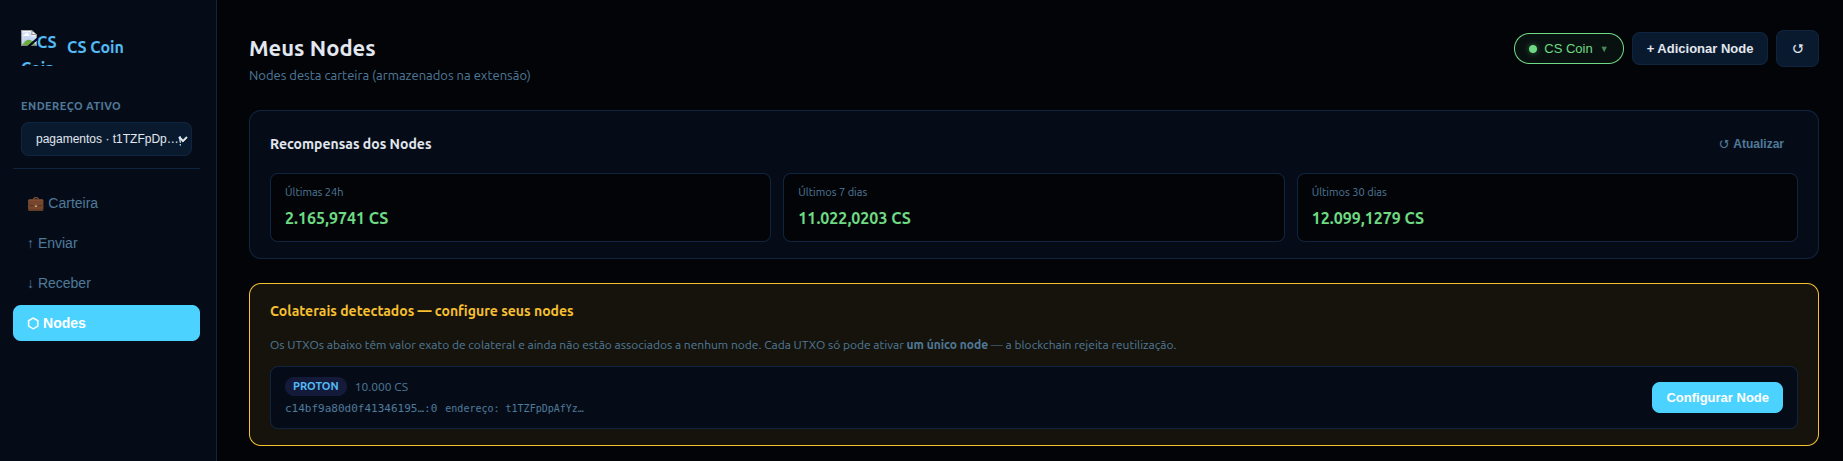
The collateral needs 100 block confirmations (~3.3 hours). Use this waiting time to set up your VM in Steps 2–3 below.
Step 2 — Create the VM in Proxmox
Download the CS Node OS ISO from the releases page and upload it to your Proxmox storage under local → ISO Images.

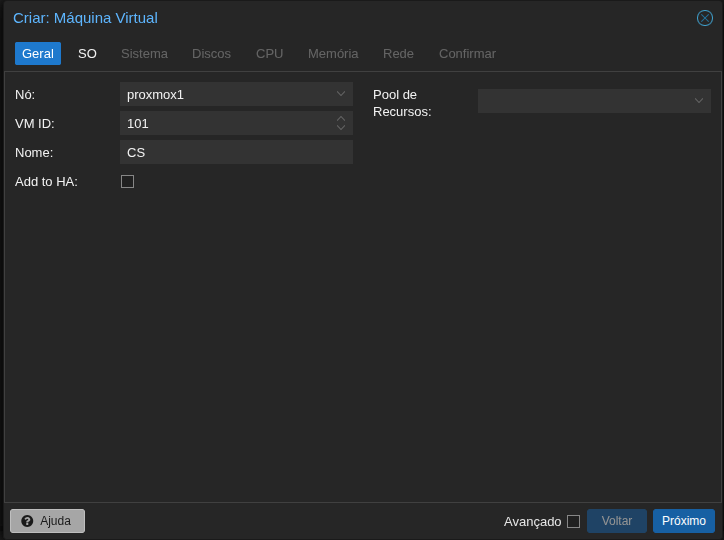
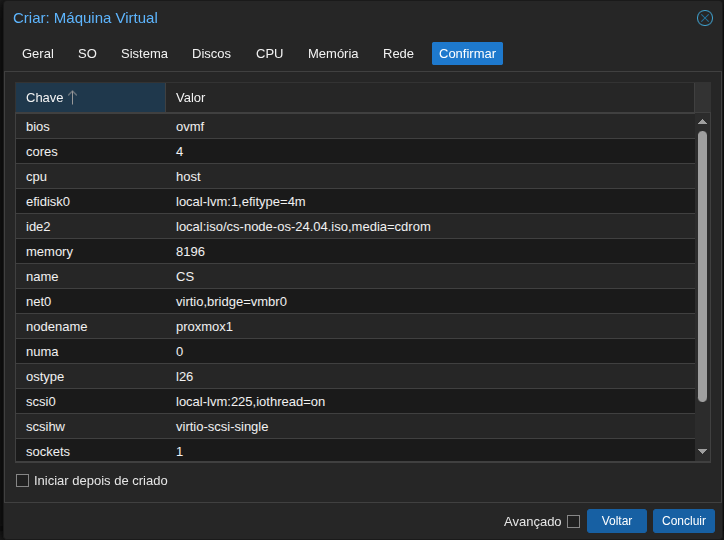
In the Proxmox web interface, click Create VM and fill in each tab:
General — give the VM an ID and a name.
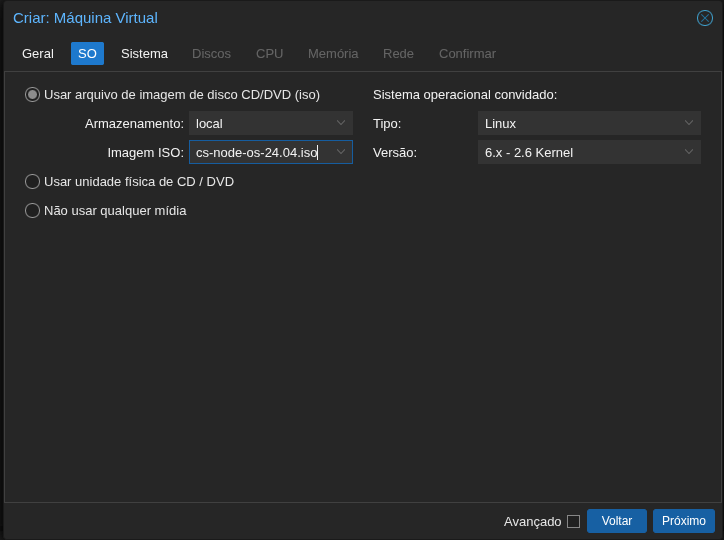
OS — select the CS Node OS ISO from local storage. Set Type to Linux, Version 6.x – 2.6 Kernel.
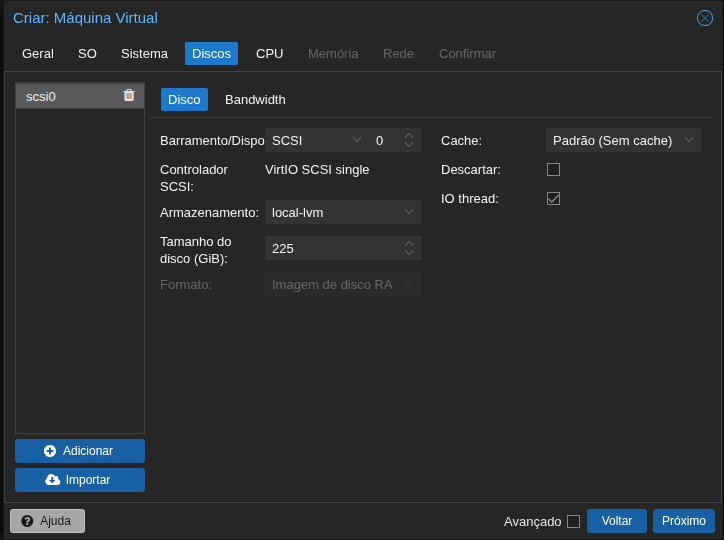
Disks — use SCSI bus, 225 GiB minimum, local-lvm storage.
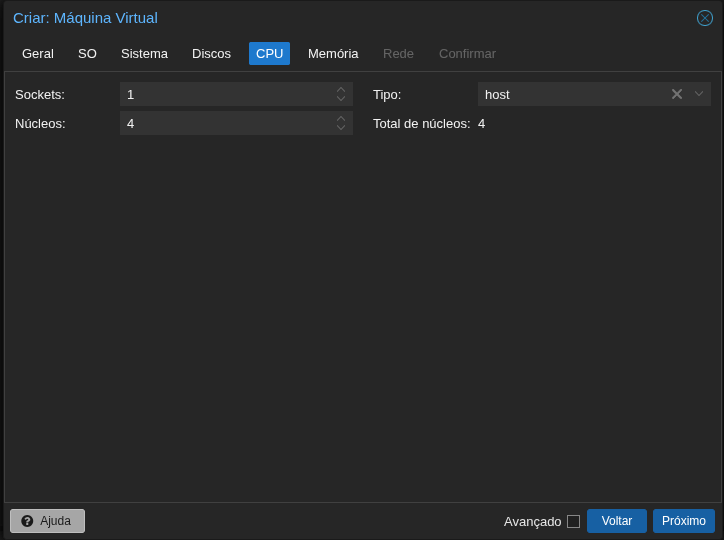
CPU — set Cores to 4 (or more for higher tiers), Type host.
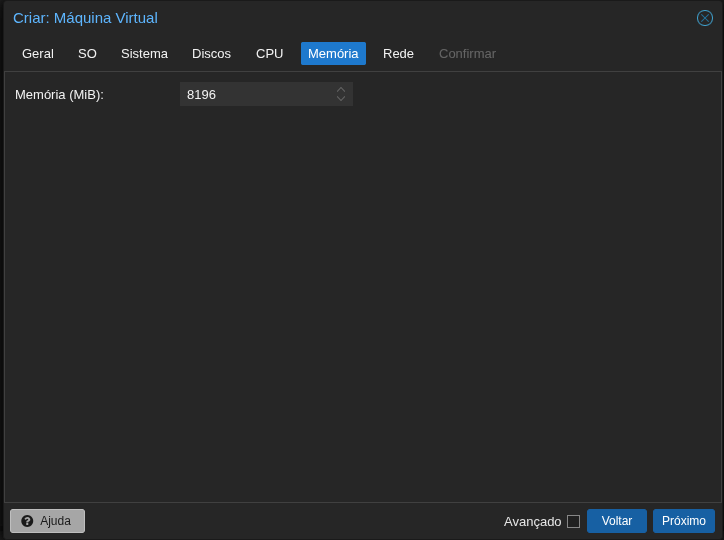
Memory — set 8192 MiB (8 GB) minimum for PROTON.
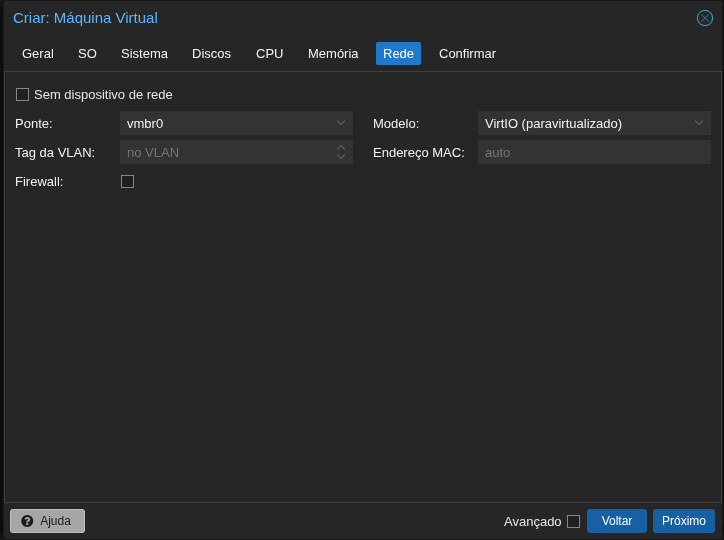
Network — Bridge vmbr0, Model VirtIO.
Review the Confirm tab summary, then click Finish.
Adjust CPU/RAM/Disk according to your tier requirements.
Start the VM. The CS Node OS installs automatically on the first boot. After reboot, cs-mage starts and shows the node status panel on port 8080.
Step 3 — Register the Node in CS Wallet
Back in the CS Wallet, click Configure Node. A modal opens — fill in:
- Alias — same alias entered in cs-mage Step 1
- Public IP : Port — the IP and port shown in cs-mage Step 2 (e.g.
203.0.113.10:26135) - Collateral TXID / VOUT — auto-filled from the detected UTXO
- Private Key — the node private key shown in cs-mage Step 3/4
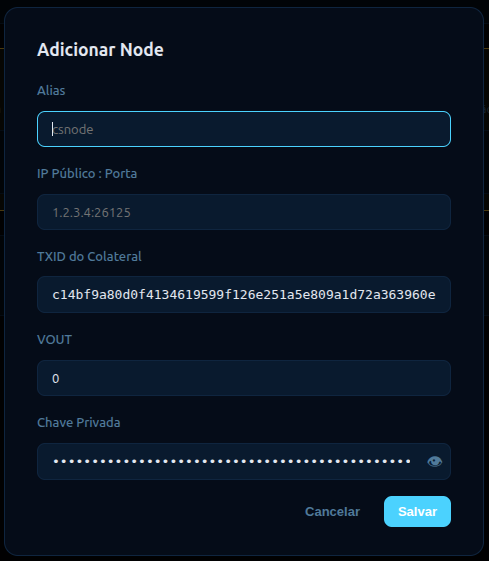
Click Save. The node config is stored securely in the Cloud Service Extension (your browser). The wallet backend never stores your node key.
Step 4 — Wait for Confirmations
After saving, the node appears in the list with AWAITING_CONFIRMATIONS status. The Start (▶) button is already visible — it will become active once 100 block confirmations are reached (~3.3 hours).

Step 5 — Configure the Node in cs-mage
After the first boot, the CS Node OS terminal displays the URL to access the setup panel.
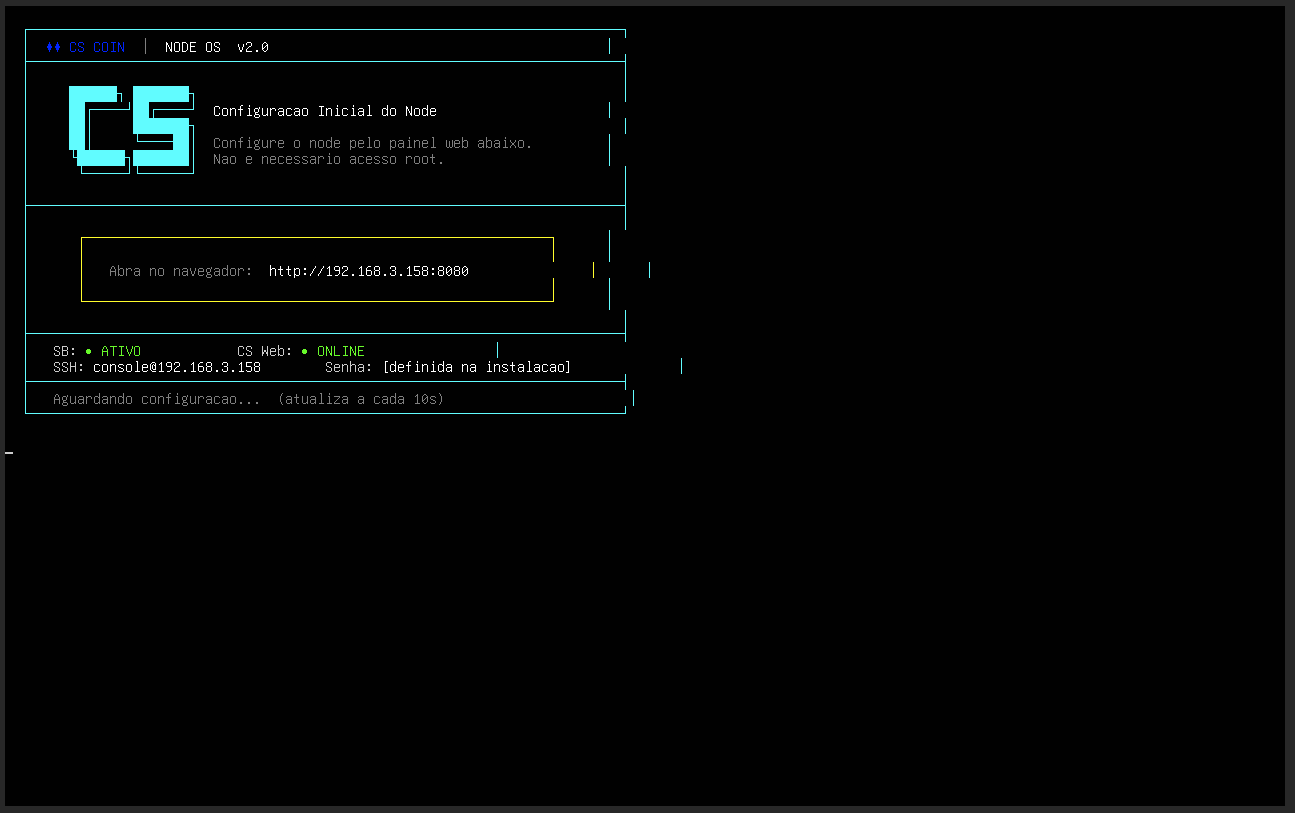
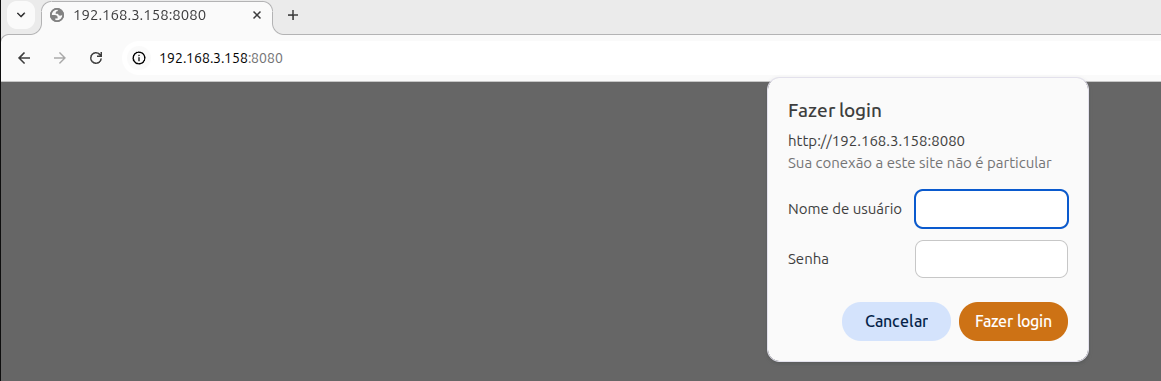
Open http://<server-ip>:8080 in your browser. A login prompt appears — enter the credentials shown on the terminal screen.
The cs-mage setup wizard walks through four steps:
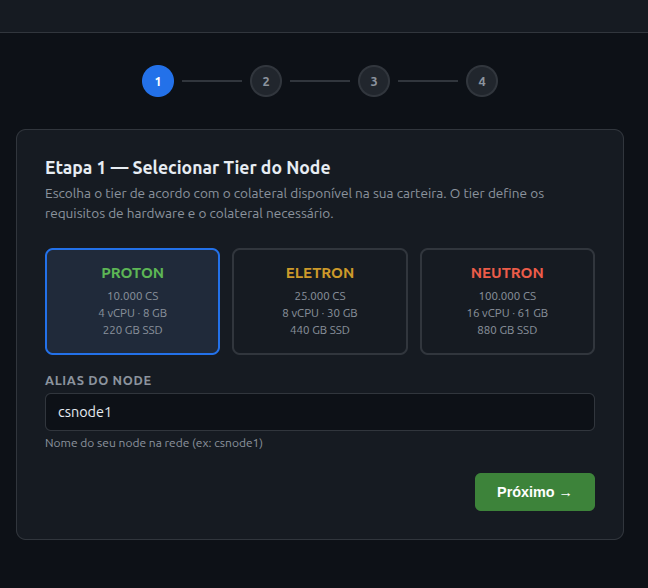
Step 1 — Select Tier
Choose the tier that matches your collateral amount and set an Alias for this node.
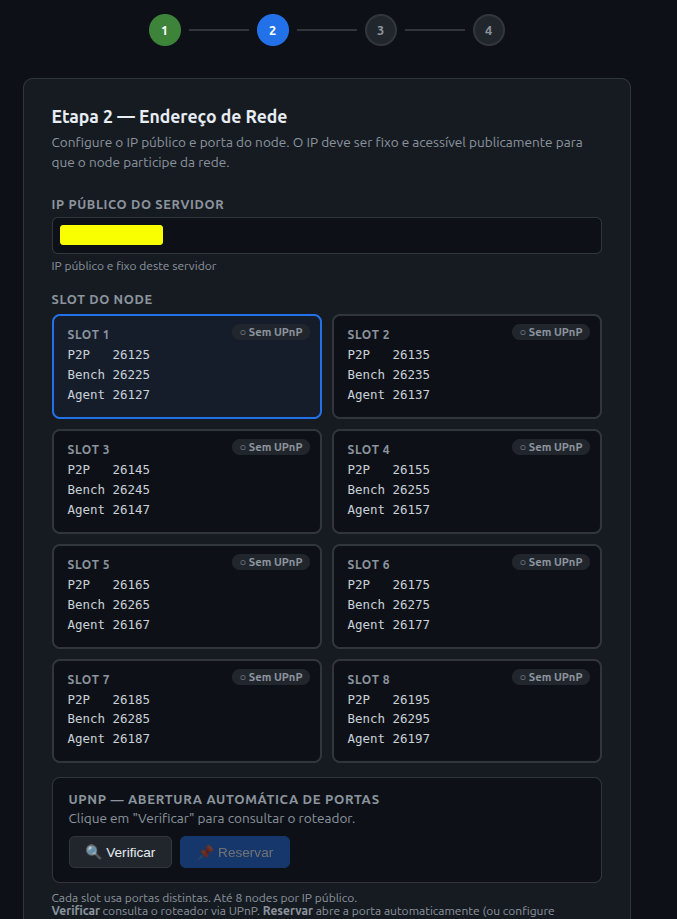
Step 2 — Network Address
Enter your server's public IP. Then select a Slot — each slot uses a distinct set of ports (P2P, Bench, Agent). Click Verify to check UPnP support on your router, or Reserve to open ports automatically.
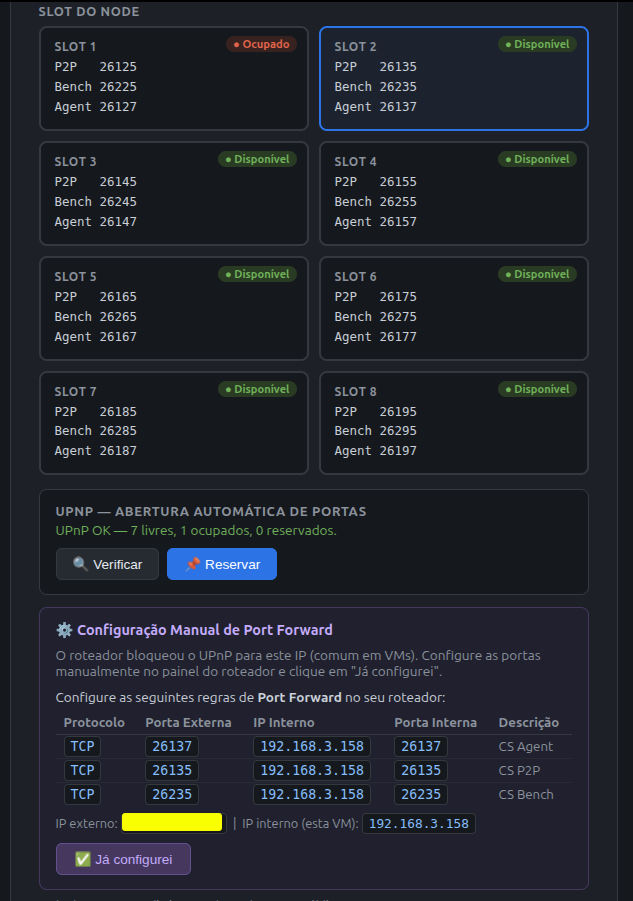
Manual port forward
If UPnP is blocked (common in VMs behind NAT), cs-mage shows a port forwarding table with the exact TCP rules to add in your router. After configuring, click Reservar.
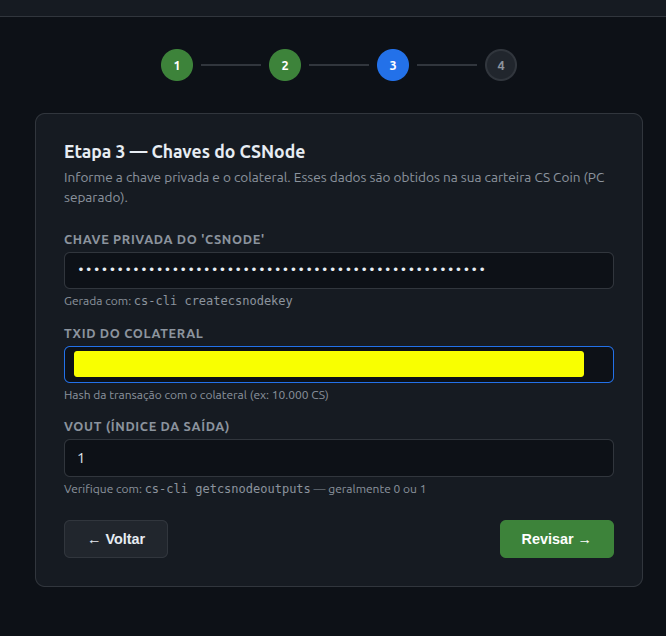
Step 3 — Node Keys
Enter the node private key, the Collateral TXID, and the VOUT — find these in the CS Wallet Nodes tab after the collateral transaction is detected.
Step 4 — Review and Confirm
Review all details (tier, alias, slot, IP, private key, TXID), then click Confirmar e Iniciar Node.
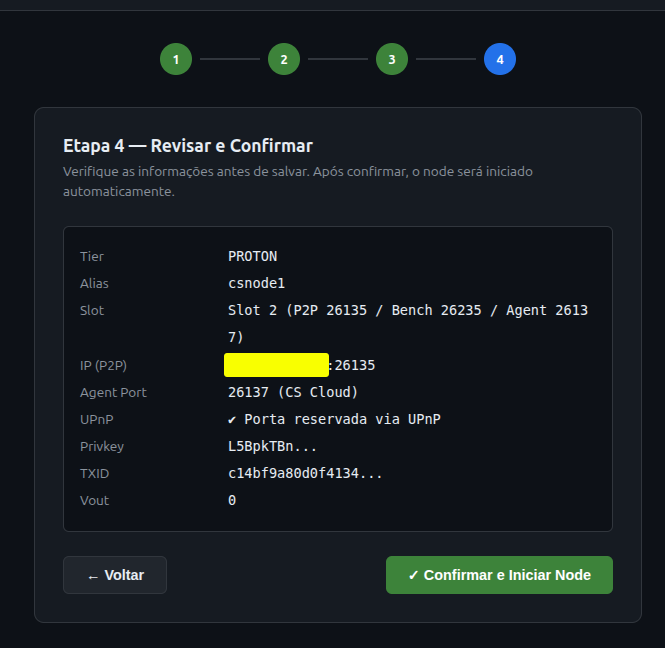
cs-mage shows the success screen. Note the private key displayed in Step 4 — you will need it in the next step.

Step 6 — Start the Node
Once 100 confirmations are reached, click the Start (▶) button on the node card.
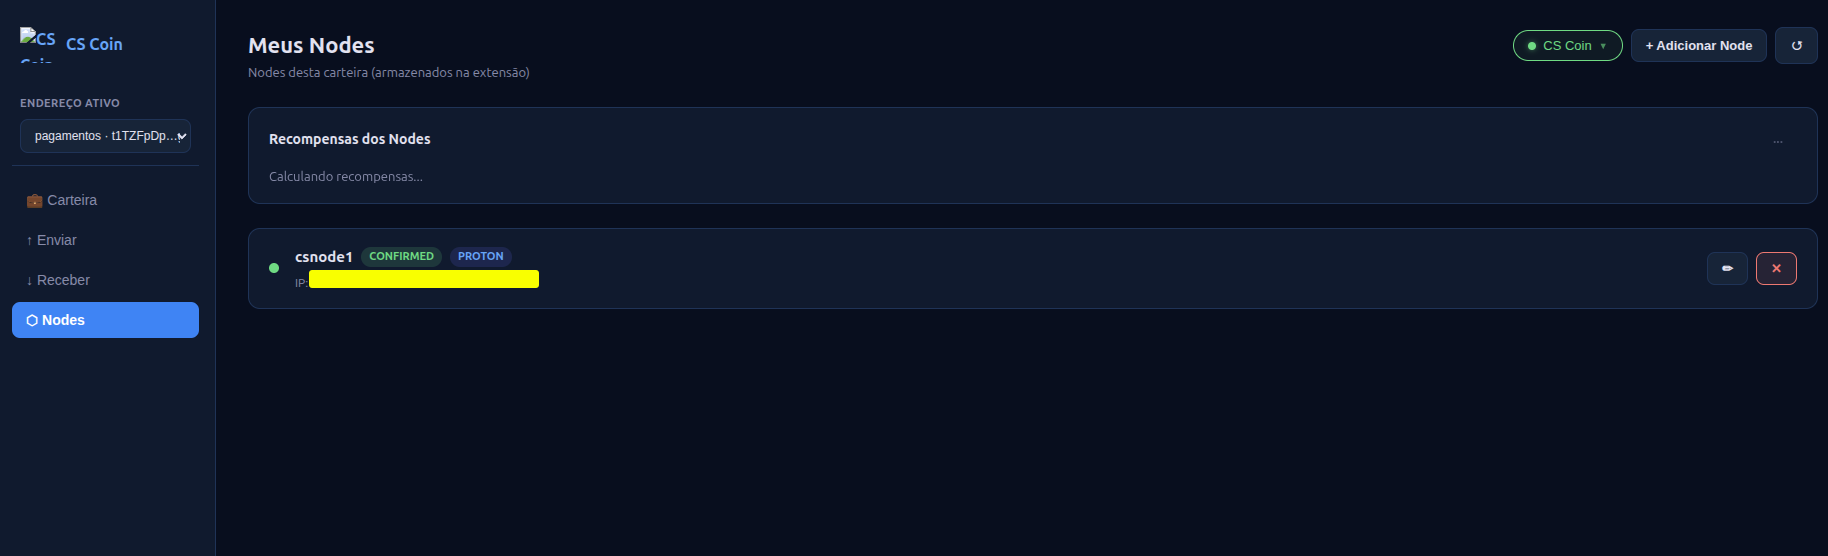
Step 7 — Monitor Activation
After confirmation, the node status progresses from STARTED to CONFIRMED within a few blocks. Once confirmed, your node appears in the Nodes tab like this:
You can also monitor the node from the cs-mage dashboard at http://<server-ip>:8080, which shows block height, connections, balance, system resources, and CSNODE status in real time.
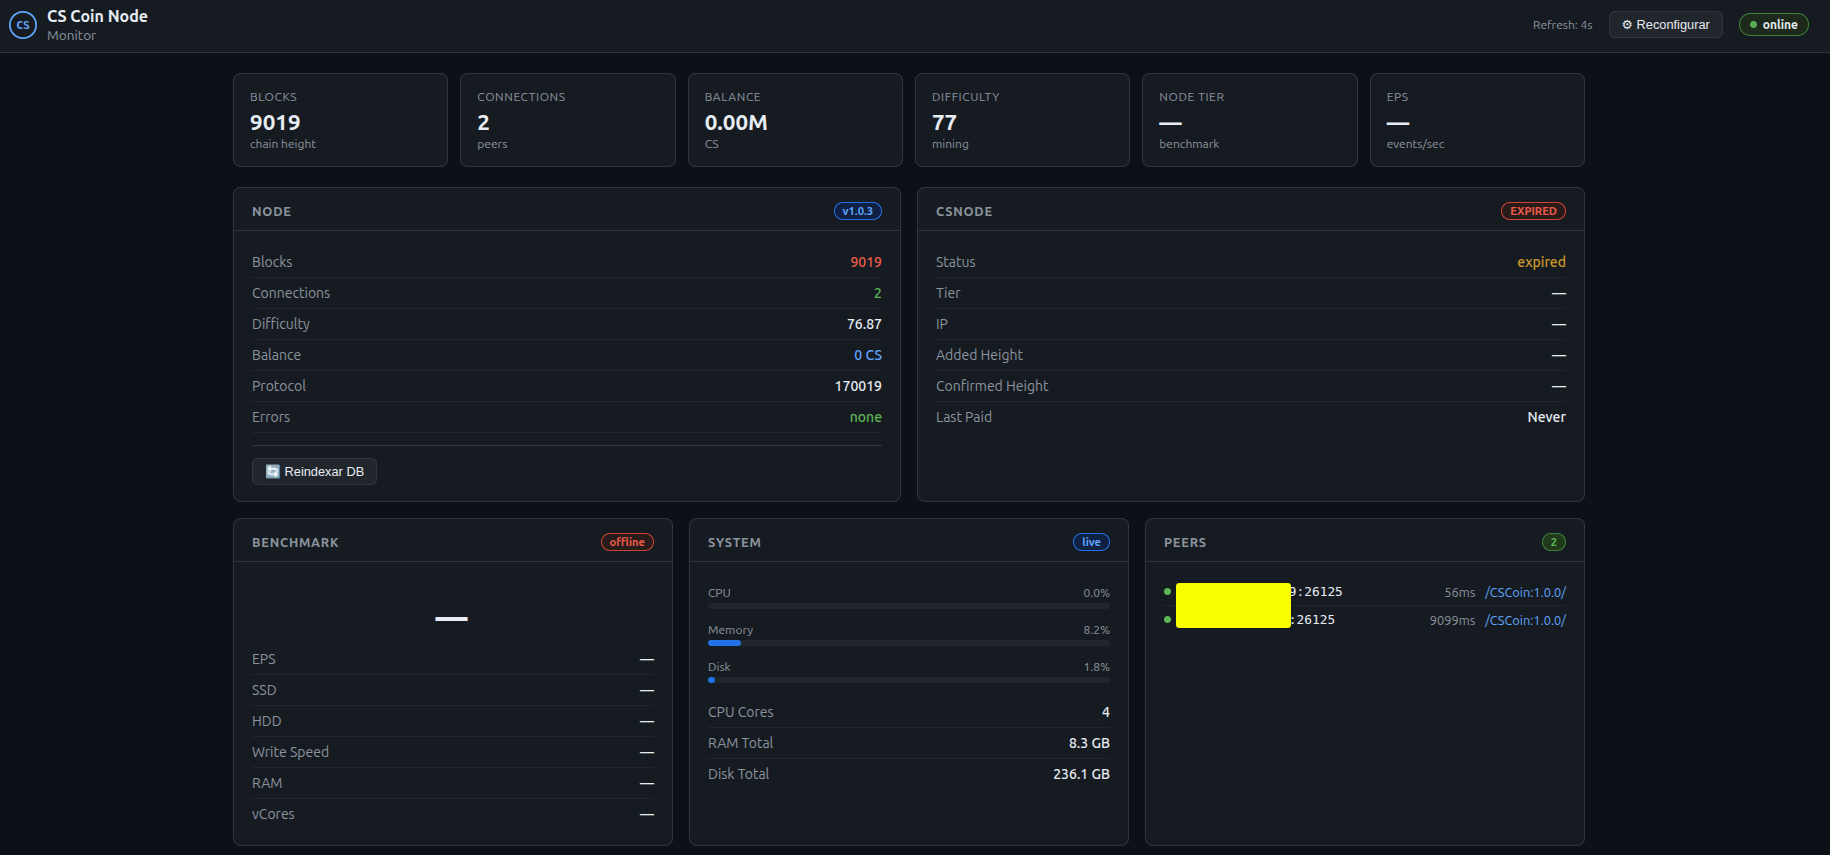
Your CS Node is now active and earning rewards every block.
Status Reference
| Status | Meaning |
|---|---|
AWAITING_CONFIRMATIONS | Collateral detected, waiting for 100 blocks |
READY_TO_START | Collateral confirmed — click Start |
STARTED | Start transaction broadcast, pending network confirmation |
CONFIRMED / ENABLED | Node active and earning rewards ✅ |
EXPIRED | Node missed re-confirmation window — click Start again |
DOS | Missed confirmation penalty — wait 180 blocks, then restart |
The CS Node OS re-confirms automatically. If your node goes EXPIRED, it usually means the server was offline — restart the VM and click Start again from the wallet.
Next Steps
- Tiers & Requirements — Hardware specs per tier
- Rewards & Halving — How you earn CS
- Monitoring & Maintenance — Long-term node management